
Do your colleagues or superiors often organize webinars to discuss important work-related issues, or perhaps you yourself regularly hold online conferences to promote your products or services, conduct online training, or chat with employees, partners, or customers? Whether you’re an organizer or a participant in a business webinar, you’ll want to keep track of the information presented and the discussion held. The best way to do this is to record a webinar. In this article, we’ll offer some general tips on recording, editing, and sharing webinars, and review 3 popular screen video recording tools.
4 tips on how to effectively record a webinar for work:
1. Choose the Right Software
Select a reliable recording tool that suits your needs. Many webinar platforms, like Zoom and GoToWebinar, have built-in recording features that simplify the process. If you’re using a different platform or need more advanced features, go on reading and discover the tools that are easy to use on your device and offer editing capabilities post-recording.
2. Prepare Your Setup
Before starting the webinar, ensure your recording environment is ready. This includes checking your microphone and camera quality, ensuring good lighting, and minimizing background noise.
3. Test Your Equipment
Conduct a test run to check that everything works smoothly. This includes testing audio levels, video quality, and the functionality of your recording software. Make sure to record a short segment and play it back to confirm that the sound and visuals are clear.
4. Edit and Share the Recording
After the webinar, take the time to edit the recording if necessary. You can add annotations, trim unnecessary parts, or enhance audio quality. Once edited, share the recording promptly with your audience, ensuring they have access to the valuable content you provided.
By following these tips, you’ll be well on your way to creating a professional and engaging webinar recording.
3 Best Software For Recording Webinars:
Let’s take a look at 3 programs that will enable you to record a webinar with ease on different types of devices: a PC, an iPhone or iPad, or an Android-based smartphone or tablet. We’re going to list the steps to follow for screen recording, as well as the pros and cons of each tool so you can make an informed choice. Let’s get started.
1. Clipify – an easy-to-use tool to record and edit videos on Windows
As business webinars are most often viewed on the computer, the first tool we’re going to consider is a desktop program that runs on all versions of Windows – Clipify, a powerful and user-friendly video editing program. We’ve chosen it for its well-developed screen recording tool and its numerous editing features. Here’s how to use it to record a business webinar.
- Download Clipify and install it on your PC.
- Launch the program and create a new Blank Project.
- Click on the Capture Screen Video button in the main window.
- Select the recorder parameters: Full Screen, Custom Area, or Window, and tick the options to record computer audio, webcam video, microphone, and highlight cursor. When everything is ready, hit Start Recording. You can pause and resume recording anytime you like.
- When finished, click Stop and then export your video in any format you need by clicking on Create Video or rewatch and edit it beforehand: cut out unnecessary parts, speed up or mute some segments, add some titles, captions, or your company logo, record your voice comments and more.

You can easily record any webinar with custom settings on your PC using Clipify
Advantages:
- Free to download and easy to use software
- Compatible with all the Windows PCs
- Elaborated recording options
- Feature-rich video-editor
- More than 30 export formats
Drawbacks:
- Screen recording with audio is available in the Pro version only
- No Mac version so far
2. Built-in iOS tool for screen recording
If you’re watching your webinar on the move on your iPhone or iPad, you can record it without downloading any additional apps. Every iOS device comes with a built-in screen recorder that’s easy enough to find and use. Here are the steps to follow:
- Go to Settings and find the Control Center option.
- Browse to the Screen Recording option and hit the green “plus” sign near it to add it to the Control Center.
- Open the Control Center on your device by sliding your finger from the top right corner to the bottom left corner.
- Hit the gray recording button. The recording will start after 3 seconds.
- When your webinar is over, stop the recording. You will find it in your Photos app.

Record any webinar, video call, or conference on your iPhone with a built-in tool
Advantages:
- Free and unlimited use
- Easy to access
- Automatic recording and saving of the recorded video
Drawbacks:
- No custom settings
- No video editing options
3. Built-in Android tool for screen recording
For the owners of Android devices there is also a handy built-in screen recording tool. Taking into account the great variety of Android devices, the process may differ slightly, but as a rule, you should do as follows to record your webinar on your smartphone :
- Slide your finger twice from the top of your screen and find the round screen recording button. If it’s not there, hit Edit and add this button to the Quick Settings.
- Hit the Record button to activate it. On some devices, you can choose if you want to record the sound of the video and that of the microphone.
- Open your webinar and start recording. You can pause and resume the recording if you need to.
- After the recording is over, you will be able to watch it from your photo gallery.
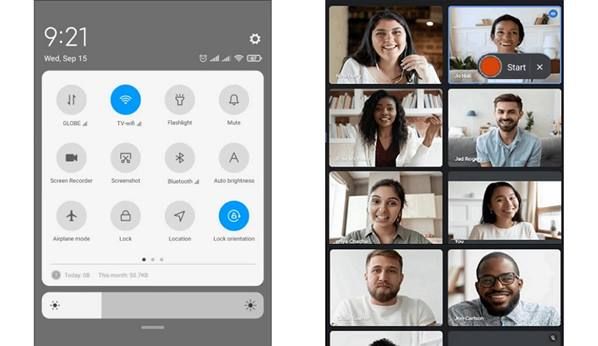
Record your webinar on your Android device with the help of the built-in tool
Advantages:
- Free and built-in tool
- Options for recording the audio of the device and the microphone
- Possibility to pause the recording
Drawbacks:
- Not always easy to access for the first time
- No editing functions
Final Thoughts:
Now you know how to record any webinar, conference, or video call for your work on your PC, iPhone, or Android smartphone with ease. If you’d like to find out more and discover other screen recording tools available in the browser, on Macs, and on mobile devices, check out the article on how to record a webinar. Choose the method that suits you and keep track of important online interactions anytime you need it.